 how-to
Preventing Water Damage During House Pressure Washing
Table of Contents
- Why Pressure Washing Causes Water Damage (And How to Stop It)
- Soft Washing vs Pressure Washing: Choosing the Right Method for Your Home
- How to Seal Windows Before Pressure Washing: A Step-by-Step Guide
- Preparing Your Exterior: Surface-by-Surface Protection
- Pressure Settings and Nozzle Selection by Material
- Signs of Water Damage After Pressure Cleaning (And What to Do)
- Common Mistakes That Cause Water Ingress
- Conclusion
- Frequently Asked Questions
Last Updated: September 28, 2026
Why Pressure Washing Causes Water Damage (And How to Stop It)
Preventing water damage during house pressure washing starts with understanding one fact: water always finds the weakest point. A high-pressure wand can push water through gaps you cannot see. At JetSet Power Washing, we have cleaned thousands of exteriors, and the damage we see most often comes from water forced into places it should never reach.
How Water Gets In: Weep Holes, Gaps, and Hydrostatic Pressure
Water enters through three main paths. First, weep holes in brick and render let moisture escape. Blast water into them and you push water behind the wall. Second, gaps around windows, doors, and pipes let water slip past seals. Third, hydrostatic pressure builds when water soaks into a surface faster than it can drain.
The Real Cost of Getting It Wrong
Repairing water damage costs far more than the cleaning job itself. You may face:
- Replacing swollen timber framing
- Mould remediation across interior walls
- Repainting and re-rendering damaged surfaces
- Fixing structural damage from long-term moisture
Soft Washing vs Pressure Washing: Choosing the Right Method for Your Home
Soft washing uses low pressure and cleaning solutions to kill mould and lift grime. Pressure washing uses high PSI water to blast dirt away. Choosing wrong is the fastest route to water damage.
When Soft Washing Is the Only Safe Option
Some surfaces cannot handle high pressure at all. Use soft washing for:
- Painted render and timber cladding
- Colorbond and metal roofs
- Asphalt shingles and older tiles
- Any surface with existing cracks
How to Seal Windows Before Pressure Washing: A Step-by-Step Guide
Sealing windows before pressure washing is the single most effective way to stop water ingress. It takes about 15 minutes per window and prevents the most common source of interior water damage.
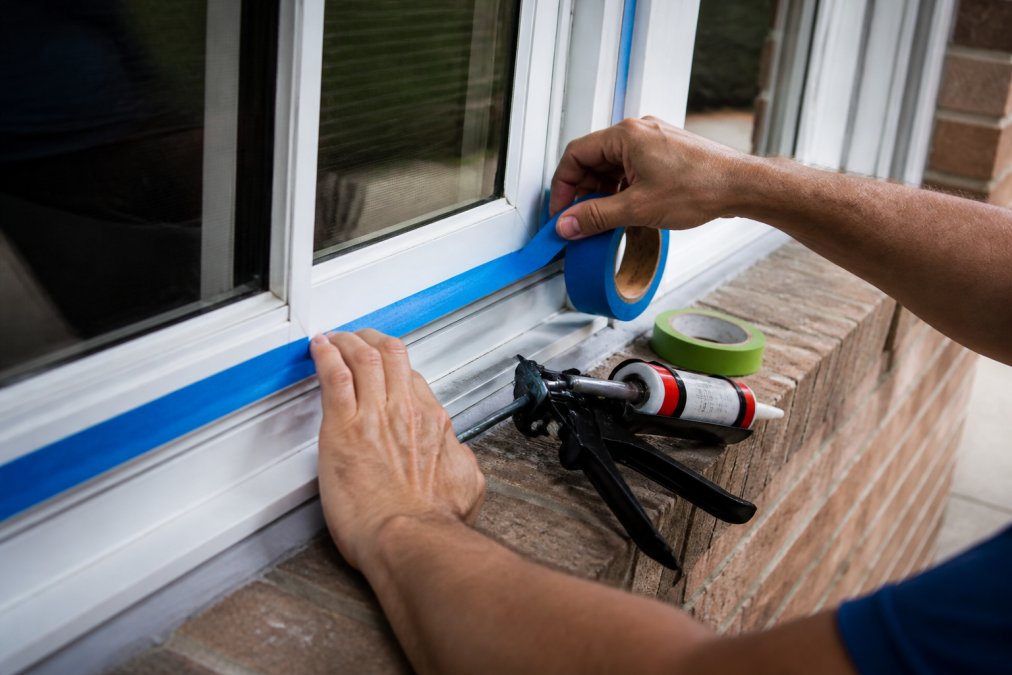
What You'll Need:
- Waterproof painter's tape
- Silicone sealant and caulking gun
- Plastic sheeting
- Clean cloth
Preparing Your Exterior: Surface-by-Surface Protection
Preparation is where most DIY jobs fail. A quick walk-around before you start saves thousands in repairs. Check every surface for weaknesses before water touches it, and, critically, know the pressure limit of each material before the wand comes out. Exceeding a substrate's tolerance is the fastest way to force water past the surface and into the structure.
- Exterior siding (vinyl): Check for loose panels and sealing gaps. Vinyl tolerates roughly 1,300-1,500 PSI at a 40-degree tip; higher pressure can crack panels and drive water behind them.
- Brick and render: Inspect mortar joints and hairline cracks. Brick itself is hard, but the mortar and any render coat are not, stay near 1,200-1,500 PSI with a 40-degree tip, and never direct a jet at a weep hole.
- Timber cladding and decking: Look for raised grain, split boards, and failing coatings. Timber is soft and porous; keep pressure low (around 500-1,200 PSI) and use a fan tip, or switch to soft washing entirely.
- Stucco and rendered finishes: Check for hollow-sounding patches and existing cracks. Stucco is brittle, low pressure only, and repair cracks before washing so water cannot enter the substrate.
- Weep holes: Note their location so you avoid them. They are a drainage path, not a cleaning target.
- Weather stripping: Test around doors for gaps that will let water past the seal.
- Drainage: Clear gutters and water runoff paths first, so dirty water has somewhere to go other than back against the wall.
- Substrate condition: Repair cracks, re-point loose mortar, and replace failed sealant before washing, not after.
Protecting Plants, Electrical Outlets, and Delicate Landscaping
- Soak garden beds before and after washing to dilute runoff
- Cover sensitive plants with tarps, and avoid spraying directly at foliage
- Turn off exterior power at the switchboard before any wet work near outlets
- Move furniture and potted plants clear of the wash zone
- Check that downpipes and stormwater connections are clear so runoff does not pool at the base of the wall
Pressure Settings and Nozzle Selection by Material
Every material has a pressure limit. Exceed it and you cause structural damage. Stay under it and you clean safely. Pressure regulation is the skill that separates a pro job from a repair bill.
| Material | Max Pressure | Nozzle Tip | Method |
|---|---|---|---|
| Concrete driveway | 3000 PSI | 25-degree | Pressure wash |
| Brick and render | 1500 PSI | 40-degree | Soft wash |
| Colorbond roof | 1000 PSI | 40-degree | Soft wash |
| Timber decking | 1200 PSI | 40-degree | Low pressure |
| Painted cladding | 800 PSI | 40-degree | Soft wash |
Signs of Water Damage After Pressure Cleaning (And What to Do)
Catching water damage early is everything. Most problems show up within 24 to 48 hours, but the damage often starts inside the wall cavity, where you cannot see it. This is the step most guides skip: checking for interior moisture after an exterior wash, not just looking at the outside of the house.
Look for these exterior and interior signs:
- Damp patches on interior walls or ceilings
- Paint bubbling or peeling near windows
- A musty smell in closed rooms
- Soft or spongy timber around frames
- Mould spots appearing on skirting boards
- Baseboards that feel cool or damp to the touch
- Wallpaper lifting at the seams
- Condensation on interior window glass that was not there before
Interior Moisture Monitoring: The Step Most Guides Miss
Water forced past cladding or window seals does not announce itself. It travels down the cavity and pools at the base of the wall, in the ceiling void, or in insulation. By the time a stain appears on the plasterboard, the moisture has usually been sitting for days.
A few low-cost checks catch it earlier:
- Baseboards: Run a hand along the top edge of skirting boards on walls facing the washed elevation. Cool, damp, or slightly swollen boards are an early warning.
- Attic or ceiling void: If you can access it safely, check insulation batts directly above the washed wall. Damp or compressed insulation loses its performance and holds moisture against timber.
- Moisture meter: A pin-type or pinless moisture meter gives a reading rather than a guess. Compare readings on the washed elevation against an interior wall on the opposite side of the house, the difference tells you whether water has entered.
- Subfloor or crawl space (where accessible): Check for new dampness, musty odour, or water staining on bearers and joists beneath the washed area.
Emergency Mitigation: First 24 Hours
The first day decides how bad the damage gets. Move quickly and methodically.
- Stop washing immediately
- Open windows and doors to increase airflow across affected rooms
- Run fans and a dehumidification unit in affected rooms, close the room up so the dehumidifier is not fighting outside humidity
- Wipe down wet surfaces and lift any rugs or furnishings away from damp walls
- Take moisture meter readings and write down the time and location of each, this baseline is what a professional or insurer will want
- Check insulation and baseboards as above, and photograph anything damp
- Call a professional if dampness persists past 24 hours, if readings are rising, or if you smell a musty odour
Common Mistakes That Cause Water Ingress
Most water damage comes from a handful of repeated errors. Avoiding them is simpler than fixing the result.
- Blasting directly at weep holes and gaps
- Using too high a PSI for the surface
- Skipping window and outlet sealing
- Washing upward, forcing water under cladding
- Ignoring caulking integrity before you start
- Leaving plants and outlets uncovered
- Not checking drainage for runoff
- Washing in strong wind that drives water sideways
Conclusion
Water damage from pressure washing is preventable, but it takes the right method, the right pressure, and proper preparation before you start. At JetSet Power Washing, our team brings over 5 years of experience and trade-grade equipment to every job. We use soft washing that is safe for paint, render, cladding, tiles, and Colorbond roofs, and we back every quote with a fixed price in writing.
Frequently Asked Questions
What are the don'ts when pressure washing a house?
Never aim a high-pressure wand upward at weatherboarding or horizontal joints. Avoid blasting directly into weep holes, electrical outlets, or air conditioning units. Don't use a 0-degree nozzle on render, painted timber, or Colorbond. Never pressure wash without first sealing windows and checking caulking integrity. Don't ignore water runoff patterns; poor drainage can send water straight into subfloor vents. And never assume a surface is waterproof just because it looks solid. Surface gouging and water ingress often happen in seconds.
Can high-pressure water get behind siding and cause rot?
Yes. Even a fan spray at close range can force water past weatherboarding, through failed caulking, or into weep holes. Once water sits behind exterior siding, it creates sub-surface moisture that leads to timber rot, mould, and structural damage. The damage often isn't visible for weeks. Using soft washing on cladding and sealing gaps before you start are the two most effective ways to prevent it. If you suspect water has already penetrated, monitor interior walls for dampness and call a professional.
How do professionals prevent water ingress during cleaning?
Professionals control three things: pressure, angle, and coverage. They use pressure regulation to match the surface, choosing soft washing for render and Colorbond and lower PSI for timber. They keep the nozzle moving and angled downward, never straight into gaps. They pre-seal windows, cover electrical outlets, and protect weep holes. They also monitor water runoff and dry time, checking for signs of water damage after pressure cleaning before packing up. Trade-grade equipment with adjustable GPM and nozzle tip selection makes this control possible.
How long after pressure washing a house can I paint?
Wait until the substrate is completely dry. In tropical conditions, that usually means 48 to 72 hours, but humidity can extend it. Test by pressing a clean cloth against the surface; if it feels damp, wait longer. Painting over sub-surface moisture traps water and causes peeling within months. If you used detergent injection or soft washing, rinse thoroughly first. A moisture meter gives a definitive reading. When in doubt, add another dry day rather than risk the finish.